Putting up Drywall is not as easy as it looks but...Hey power to ya if you want to to try.
What are you going to attach the drywall to?
Before you do anything you have to determine what you are going to attach the dry wall to..
A ceiling?
Is the ceiling going on new construction
On top of another ceiling which is drywall
On top of another ceiling which is plaster/lath (pronounced as laath)
You don't know what it is? You must know and find out.
Is there insulation in the ceiling?
Is the insulation new or old?
It is always better to remove the old ceiling, fix any creeks in the floor above, put sound insulation in and then put the new drywall in.
Did you know that there are alternatives to drywall?
Is it for sound or does it have some other purpose.
Is there an existing vapor barrier?
Is there no vapor barrier?
How do you know when you need one?
If it is a brick wall:
a) Is in an interior brick wall?
b) Is it in exterior brick wall?
With insulation?
Without insulation?
With wood strapping?
With wood studs?
With Metal Studs?
Will it be in the basement?
Or will the drywall be the main floor?
How about a bathroom with direct moisture?
How about a powder room, do you need water proof drywall in there?
What will be in the room you are creating; for people or for wine??
Is it block wall, an interior wall or an exterior wall?
A concrete wall ? Are you confused Yet? If not, read on......
I think I will make an
Let us make some assumptions and pretend we live in a perfect world where the walls are straight (HAHAAHAHEHEHEHEH)
The walls are square (HAHAHAHEHEHEHEH) and the floor you are following is straight (HA!)
And the ceiling is straight (YA right!)
We also will assume that the studs are wood) (those
pieces of wood that run vertically (up-down) in the wall)
We will also assume they are straight and level
 And let us assume that their studs are 16 inches apart( like
they are supposed to be) *that
is a joke too as I rarely see that either.( I have seen about 25 of them
in the 20 years I have been in business) and with all that in
mind.....are you ready???? Who cares! Here we go......
And let us assume that their studs are 16 inches apart( like
they are supposed to be) *that
is a joke too as I rarely see that either.( I have seen about 25 of them
in the 20 years I have been in business) and with all that in
mind.....are you ready???? Who cares! Here we go......
Cutting
Drywall
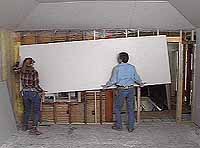
 Use full sheets of drywall whenever possible. Cut the length of the
sheet so that the end falls in the center of a joist or stud. A
joist is what is running in the ceiling or floor It is usually wider
than a stud). You have to
laugh when you think you are going to sling boards around by yourself
that can weigh up to 50 lbs each. But, it is a good
way to quickly realize that you should have gone to work!!!! And leave
it to the pros.
Use full sheets of drywall whenever possible. Cut the length of the
sheet so that the end falls in the center of a joist or stud. A
joist is what is running in the ceiling or floor It is usually wider
than a stud). You have to
laugh when you think you are going to sling boards around by yourself
that can weigh up to 50 lbs each. But, it is a good
way to quickly realize that you should have gone to work!!!! And leave
it to the pros.
Studs, if they are make from wood are made from a 2x4. That 2" think by 4" wide. But A 2x4 is not really a 2x4 it is more like 1.5 to 1.75 inches by 3.5 inches. Why? Because the lumber companies want to make more money. And it is still called a 2x4.
Are we having fun yet????
But wait
there is more. if you really want to confuse yourself, introduce
some of the metric system into that and wa la!!! You have total
Chaos and confusion!!!!
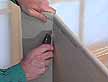
To cut a
sheet for length, first set it upright, if it fits with the finished or
lighter side out; unless you are using green or
blue board which means the colour side has to be facing out. Out
means facing you!! Measure out the length with a tape
measure. Then using a drywall "T-square" on that mark as a guide, score
the front side with a utility knife. (you don't have to go deep but
if you are a weeakling then go over it twice. The blade needs to
dink into at least 1/16th of an inch.
 Snap
the drywall back. It should break apart right at the cut. That doesn't
cut the paper on back, though, so to finish the cut run the knife blade
down the back side to cut the waste free.
Snap
the drywall back. It should break apart right at the cut. That doesn't
cut the paper on back, though, so to finish the cut run the knife blade
down the back side to cut the waste free.
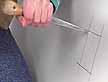
Making cuts along the length of a sheet is a little trickier. One way is to snap a chalk line along the sheet and then score the line by hand. A caulk line is a really cool tool that will save you lots of time. Basically it is a box with some string in it mixed with a power dye. When you pull the string out and lay it tightly in a large pc of drywall, all you have to do is lift the string a bit with one hand while you are holding it tight with the other and let go of the string that is lifting it and like an elastic band it makes a like on the board. However be aware, though, that sometimes the chalk will bleed through the paint. If you have an 8' straight edge that would work, too. There are many different types of caulk lines and are for different purposes. There are also different colours to. Stick with blue, it will look good on you!!!
Another
way to make this kind of cut is with a tape measure. Hold the tape
measure in your left hand with your thumb and fore finger at the
dimension you want. Hold the blade of your utility knife under the end
of the tape, holding it against the hook. Now run your left hand across
the top of the board, and score the drywall with the knife. This is not
a super-accurate method, but it's good enough for hanging drywall.
Do not force drywall together. Don't make the cuts to close that
you can't fit them in easily. The drywall compound will fill in
the gaps just fine after you put the tape on.
OK..OK..Spare me the details!
But we are not finished yet!
I will sign in and then book Les in.
When you
need to cut inside corners, cut one side with a drywall saw. Then score
the other side with a utility knife and snap it back like you would any
other cut.
Another
way to cut inside corners is to first install the piece, then cut it
with a drywall saw along the framing.
Cutting for Lights, Switches and Outlets are also lots of fun!!!
 Cutting holes in drywall for lights, switches and outlets requires
careful measuring and marking.
Cutting holes in drywall for lights, switches and outlets requires
careful measuring and marking.
For round
light fixtures, like recessed lights, measure from the edge of where the
drywall sheet will go to the center of the circle. Do this from both the
side and top. Then transfer these measurements to the sheet of drywall.
Be sure the white side is facing you.
Use this
mark for the center of your circle hole cutter. Also measure the
radius of the round fixture to set the arm length of the cutter. Score
the circle several times, then tap it out with a hammer. (the pros use
the hole saw or a Zip tool)
You can
also use a compass to draw the circle and a keyhole saw to make the cut.
For switch and outlet boxes, measure from the side edge of where the sheet will go to the right and left side of the box. And measure from the top edge to the top and bottom of the box. Transfer these to the sheet of drywall and cut it with a keyhole saw. You have an 1/8 of an ich to play with. (if it is an outside wall for example, make sure you have the right insulation and plastic on the receptacles, which will keep the cool air that wants to come in, at bay.
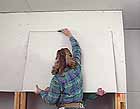
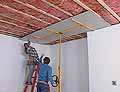
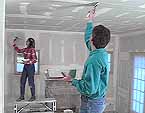
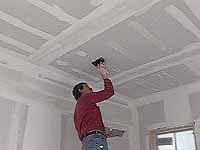
 When hanging drywall always work from the top to the bottom. And always
run the drywall sheets perpendicular to the framing as shown here to the
right.
When hanging drywall always work from the top to the bottom. And always
run the drywall sheets perpendicular to the framing as shown here to the
right.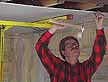 Building
codes have very strict regulations about how many fasteners need to be
used to attach drywall.
Building
codes have very strict regulations about how many fasteners need to be
used to attach drywall.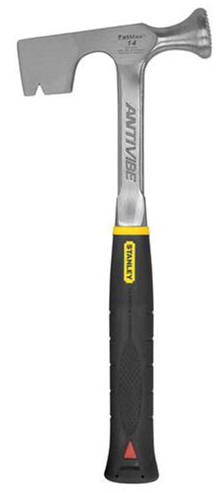


 Getting sheets of drywall up to the ceiling can be tricky. And once you
get them up, holding them in place while you screw or nail them is
another challenge. You'll need the help of a drywall lift or drywalls
jacks for this...although some people just use their heads,
literally! But by the time you start getting into this stuff, you
may want to just hire a pro.
I will refer you to someone because I do not do drywall anymore.
Getting sheets of drywall up to the ceiling can be tricky. And once you
get them up, holding them in place while you screw or nail them is
another challenge. You'll need the help of a drywall lift or drywalls
jacks for this...although some people just use their heads,
literally! But by the time you start getting into this stuff, you
may want to just hire a pro.
I will refer you to someone because I do not do drywall anymore.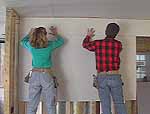 The rules for hanging drywall on walls are basically the same as those
for hanging ceilings.
The rules for hanging drywall on walls are basically the same as those
for hanging ceilings.
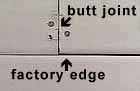 A real important thing to remember when hanging any drywall is to line
up the joints right.
A real important thing to remember when hanging any drywall is to line
up the joints right.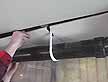 When
you have soffits to drywall, hang the bottoms of the soffits with the
ceiling and the sides of the soffits with the walls. What???
When
you have soffits to drywall, hang the bottoms of the soffits with the
ceiling and the sides of the soffits with the walls. What???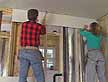 Where
you put the ripper depends on a variety of factors. You may want to put
the ripper on top instead of on the bottom so you don't have to bend
over when taping. Put it on the bottom if you have several things
breaking up the wall, like doors or a fireplace, so you don't have as
many joints. And if your ripper is only a few inches wide, you may want
to put it in the middle of the wall. That way you end up with two joints
close together and you can combine them into one wider joint.
Where
you put the ripper depends on a variety of factors. You may want to put
the ripper on top instead of on the bottom so you don't have to bend
over when taping. Put it on the bottom if you have several things
breaking up the wall, like doors or a fireplace, so you don't have as
many joints. And if your ripper is only a few inches wide, you may want
to put it in the middle of the wall. That way you end up with two joints
close together and you can combine them into one wider joint. Outside corners can get damaged easily so you want to protect them with
a metal corner bead. Do this before starting the tape coat.
Outside corners can get damaged easily so you want to protect them with
a metal corner bead. Do this before starting the tape coat.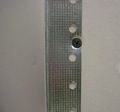
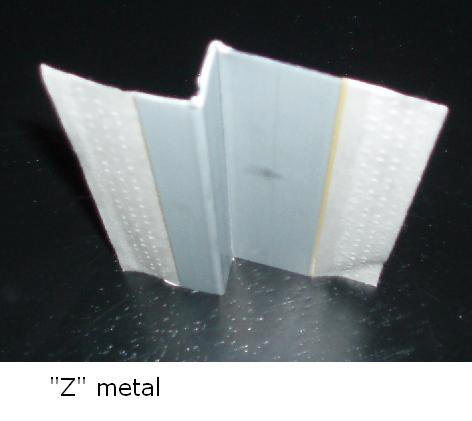 There are
the whole range of corner bead as well as meals and plastics which can
also be good depending on your application.
There are
the whole range of corner bead as well as meals and plastics which can
also be good depending on your application.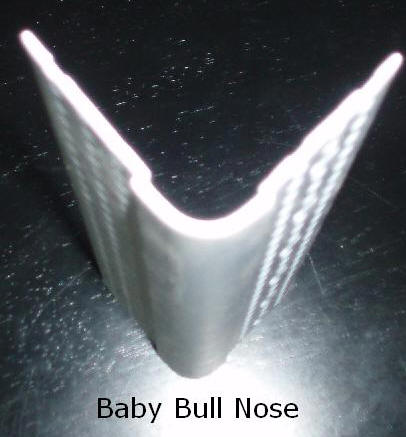
 Before starting the taping process, make sure corner bead is installed
on all outside corners.
Before starting the taping process, make sure corner bead is installed
on all outside corners.
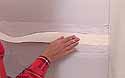 For the second pass, lay a piece of joint tape over the center of the
joint. Press it lightly with you hand--just to make it stick for now.
For the second pass, lay a piece of joint tape over the center of the
joint. Press it lightly with you hand--just to make it stick for now.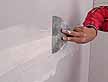 The last step for the tape coat is to spread a very thin layer of mud
out on top of the tape.
The last step for the tape coat is to spread a very thin layer of mud
out on top of the tape.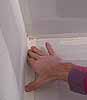 Inside corners also get treated with joint tape. There may or may not be
tapered edges here, but it doesn't really matter too much. Slightly
uneven walls won't be as visible in the corners as on a flat wall.
Inside corners also get treated with joint tape. There may or may not be
tapered edges here, but it doesn't really matter too much. Slightly
uneven walls won't be as visible in the corners as on a flat wall.
 The tape coat leveled off everything, and the next two coats will make
the surfaces smooth.
The tape coat leveled off everything, and the next two coats will make
the surfaces smooth.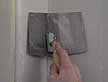 Inside corners are a little trickier than flat joints. Once you've
feathered one side it's tough to work on the second side without
disturbing the first.
Inside corners are a little trickier than flat joints. Once you've
feathered one side it's tough to work on the second side without
disturbing the first.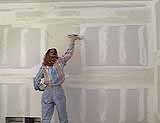 The finish coat is where you have to be a real artist. You don't
want to leave any grooves or streaks after you're done.
The finish coat is where you have to be a real artist. You don't
want to leave any grooves or streaks after you're done.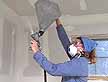 Ceilings tend to be the most exposed part of a drywall job. Light thrown
across it by ceiling fixtures really bring out any irregularities in the
surface. Walls are usually broken up by furniture, windows, door or wall
hangings, so their flaws are a lot less noticeable.
Ceilings tend to be the most exposed part of a drywall job. Light thrown
across it by ceiling fixtures really bring out any irregularities in the
surface. Walls are usually broken up by furniture, windows, door or wall
hangings, so their flaws are a lot less noticeable. One
treatment we've used is sometimes referred to as "knockdown."
For this you need to rent a sprayer and use it to "splatter"
thinned joint compound onto the ceiling. There are also special
texturing compounds made just for this purpose.
One
treatment we've used is sometimes referred to as "knockdown."
For this you need to rent a sprayer and use it to "splatter"
thinned joint compound onto the ceiling. There are also special
texturing compounds made just for this purpose.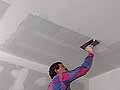 The moisture and heat in bathrooms and kitchens are more likely to cause
dirt and stains on the ceilings. For these areas many people choose to
go with a flat surface on the ceilings which is easier to clean.
The moisture and heat in bathrooms and kitchens are more likely to cause
dirt and stains on the ceilings. For these areas many people choose to
go with a flat surface on the ceilings which is easier to clean. Sanding down the walls is the final step to prepare them for priming.
You also sand ceilings if you've put a "skim coat" on them.
This will smooth down any last little ridges you may have.
Sanding down the walls is the final step to prepare them for priming.
You also sand ceilings if you've put a "skim coat" on them.
This will smooth down any last little ridges you may have.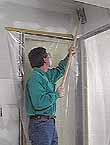 Pole sanders are good for reaching up to ceilings and walls. Poles with
swivels on the ends make them easy to maneuver almost anywhere.
Pole sanders are good for reaching up to ceilings and walls. Poles with
swivels on the ends make them easy to maneuver almost anywhere.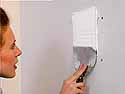 Small nail holes or shallow dents can be repaired pretty easily with a
little bit of patching compound and a putty or taping knife. Then let
the compound dry, sand over it, then prime and paint.
Small nail holes or shallow dents can be repaired pretty easily with a
little bit of patching compound and a putty or taping knife. Then let
the compound dry, sand over it, then prime and paint.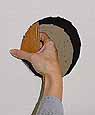 Larger holes in drywall are difficult to patch because there's no
backing material behind them.
Larger holes in drywall are difficult to patch because there's no
backing material behind them.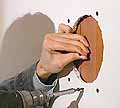 You
could also use plywood strips as the backer, cutting them longer than
the hole, but narrow enough to go through the hole.
You
could also use plywood strips as the backer, cutting them longer than
the hole, but narrow enough to go through the hole. Another
method is called the "hat patch." For this you cut a piece of
drywall the size of the hole, but leave the paper on front run an inch
or two longer. The paper will serve as the joint tape.
Another
method is called the "hat patch." For this you cut a piece of
drywall the size of the hole, but leave the paper on front run an inch
or two longer. The paper will serve as the joint tape.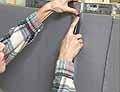 Concrete Backerboard is usually used as an underlayment for ceramic
tile. It can be used on walls, floors or countertops.
Concrete Backerboard is usually used as an underlayment for ceramic
tile. It can be used on walls, floors or countertops. Cutting Backerboard is a lot like cutting drywall, except that Backerboard
is much harder. Using a framing square, score your cut line a few times.
You can use a regular utility knife for this, but you'll go through a
lot of blades. A special carbide-blade cutter works better.
Cutting Backerboard is a lot like cutting drywall, except that Backerboard
is much harder. Using a framing square, score your cut line a few times.
You can use a regular utility knife for this, but you'll go through a
lot of blades. A special carbide-blade cutter works better. Start installing Backerboard at the furthest back wall and work your way
from the bottom up.
Start installing Backerboard at the furthest back wall and work your way
from the bottom up. You want to mud and tape the joints of the Backerboard also.